Showing posts with label Test. Show all posts

Rainbow Animation

Published by Spider-Doo under , , on 15:32

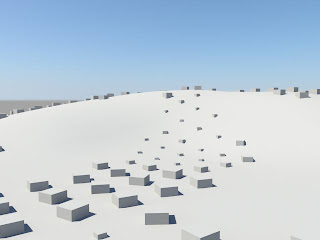
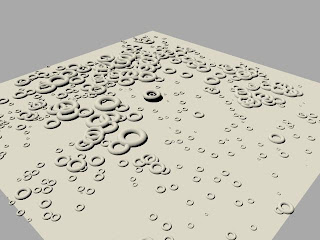
Above is the textures I used to for the rainbow animation, which was done by animating along a curve. Its was done with surfaces then converted to a poly as you cant use the extrude under the polygon tabs. The hardest part was getting the spacing in the aches correct so its doesn't look odd.

This was the tutorial that I looked at to achieve the rainbow.

http://www.wonderhowto.com/how-to/video/how-to-extrude-a-surface-along-an-animated-curve-in-maya-248996/


Cart Smashing into the jury room.

Published by Spider-Doo under , , on 13:28
I started looking into the cart smashing through into the jury room from the tests that I done at the start of the year. I quickly picked up from where I left off. I had to make a special map for each plank so that when the cart hits, they break up like wood smashing apart. There are a few tweaks that Ive still got to do, but this wont take too long. The debris and chunks of wood will be composited in at the end.

This is the fracture map that determines how the pieces brake up, but this was the wrong size and all the parts didn't break up like in the image.

I re sized it to 60 pixels by 60pixels like in a tutorial and even though it looked OK in the screen it still didn't break up properly.I decided to do each plank with this fracture map below and its works a treat :D


Here's a few screen shots attempts that Ive tried.
If there is time I will use this same plug in (blast code) for the zombie hand smashing through the mausoleum.


Here's a few different video clips of my attempts at getting it right.


flag animation test on the castle for kittys room

Published by Spider-Doo under , on 15:55

Here I wanted to add some animation to the flags on top of the castle as flags would naturally be moving in the wind. This scene is going to be very short so you wouldn't necessarily see this this but it will be better then solid flags not moving and it will add the the rest of the scene making it move believable.

Tree Animation

Published by Spider-Doo under , on 01:08
From the meeting with Dan Dali yesterday he mention about how everything moves slightly and nothing is static. Dan said about how the trees could move about in the wind. With us looking out at the window at the leave as they were blowing around. To have all this secondary animation in the background would make our whole animation move believable.
With this in mind I found a really good way of animating the trees and grass to sway in the wind a little bit.

This is what I quickly put together to show the rest of the group. The trees wouldn't blow about as much as in this video below, but I wanted to over exaggerate the movement of the trees.
Also, just as a test I put this on the rest Farm to test if everything was working as it should be.
These 100 frames took about 2mins to render out using 70 odd CPUs which was pretty GOOD ! : D

Epileptic Lights arghhaha

Published by Spider-Doo under on 14:04
Here are some of the tests that I done with the light expressions. They work really well with the cart sparks as they emit going round the corners on the track.


This is one expression that I used on the point lights for the cart.

pointLightShape1.intensity = sin((time * 50)*pointLightShape1.OF);


Brace your self !

Light expressions

Published by Spider-Doo under on 12:18
Where the cart is going round the corner in the caves making sparks it produces a lot of light or flickering of light. Instead of keying the light intensity on and off manually, I wanted to have more of a random feel to the light intensity, to make it more natural.
I started to learn a little a bit about expression in maya and applied this to the lights intensity. After a while trying to make this work I kind of got a desired look and feel to the light, but the only problem was that this worked throughout the whole timeline, which I i didn't want. I still wanted to be able to have a master control over it turning on and off. This proved a little tricky as the new attribute didn't want to go under the right section on the light. Then though the hypergraph managed to put in under the section, (which was Lightshape1) and made this keyable.
Here's a couple of pic to show you what I mean.

In the video below you can see the effect of the expressions on the light.
This has worked really well to have a organic feel to this. Pleased with this :D ! !

Sparks

Published by Spider-Doo under on 04:22
From having a little play around in Maya at making sparks for the cart on the mine cart section, I wanted to have some reference to work from.
I have a fire flint and striker to make fires if you don't have matches available.

"The magnesium alloy rod and striker will last for up to 3,000 strikes, producing a 3,000°C (5,500°F) spark that is bright enough to be used as an emergency signal."

I was using this fire flint and striker and a lighter to produce the sparks.

Here are some videos and pictures of what I have.


Here is the video that I complied.

Cup of lava

Published by Spider-Doo under , on 08:09

A slightly different way of creating lava with N cloth, but this way takes awhile to calculate and render. Quite nice finish though.

Smoke testing

Published by Spider-Doo under , on 06:15

I started testing out how smoke would interact with the cart as it going though a tunnel like scene. This was more difficult then expected. You can see in the video that the smoke from above hits and rolls over the cart as it goes past. Also I added smoke to the rear of the cart, which is meant to be a smoke trail.


Am still not initially happy with this at the moment but I will tweak parts for it too look rite.

Normal mapping

Published by Spider-Doo under , on 03:43
I started to brush up on normal mapping in Maya for parts of the environments. I was looking through different tutorials on the Internet and some of them mentioned the NVIDIA Texture Tools. It showed them using a normal colour texture in photoshop and using the Nvidia plug-in to generate a normal map from this simple colour texture."It creates normal maps from height maps for per pixel rendering." This was a really quick process to get loads of detail from the original map.

Below is what I achieved.

Another way I found from watching a tutorial was a programme called Crazy Bump. It works in the same principle as the Nivdia plug-in but it allows you to change more options. Also not only can you create a normal map you can out-put a displacement map, specularity map, a diffuse map and a occlusion map.

This is such a nice tool that will work wonders with the texturing process.

http://www.crazybump.com/

Here what I have achieved.


More lava

Published by Spider-Doo under , , on 14:14
I wanted to start to get a sense of what the final lava would look like in the final animation. Here are the tests that I have done which are getting very close to what I want. It will be done with particles and animated textures. The particle system will be when the lava is coming out of cracks in the rocks and a lava-fall. The only thing that I need to do now is the slow the speed of the animated lava texture so it doesn't seem to runny! Then this will be sorted ! :D Yay really pleased with the out comes so far.

First attempt

Started animating the texture.


Second attempt

Getting the texture right for the lava with lava bumps flowing inside as well.


Third attempt

With this one I put it into a little scene with the particel lava flowing out of a crack in the wall into the lava below. Also I added textures and lighting. This one looks the best so far ! Really pleased with it, tho texture needs to be slowed down a bit so looks more like lava.


Hope you like.

Dynamic chain test

Published by Spider-Doo under , , on 14:49
For the fence around the ride there is a gate which has a chain around it locking it together. I was looking into using Dynamic for the chain so as the character come thought the gate the chain will rattle as they go though. . This seems quite simple in theory but harder in practice.
The first part was getting the chain to interact with its self, so it can be linked together. The problem that I found out was this only worked well if each chain link was bout 8 polygons, it didn't like anything higher than this.

I founds another way of linking the chains together through bones and parenting each link to a joint and trying it that way. The only problem with this was that is didn't really move link a chain.

The chain seems the move about unnecessary and doesn't look rite


It kinda works on this one, but its only a low polygon chain :(


Here is one where the links are parented together but doesn't really move like a chain. Though it gives the sense of chain like movement.


The next thing I will try is using cluster with a curve to make the chain links move. This will have to be animated by hand though as the gate opens. This could be the best way of doing this.
Just have to wait and find out.....

Painting Objects

Published by Spider-Doo under on 06:06
For creating an exterior environment things have to look organic and not look like they have been place there by some one. I was looking at different tutorials on different websites and there was one that I kept seeing and didn't know what it was trying to do. I found out that it was for using the paint tool for geometry that you have made so you can paint this onto a surface.

This is the tutorial that I looked at.

I thought I could use this as a way of making rocks or other objects that can be put into the environment more randomly taking little time as possible.

I got to the end of the tutorial and it still didn't work. It just wouldn't paint my objects that I made. I went looking for similar tutorials on this and there were no others. After 30mins of messing about trying different buttons etc I looked in the Maya help files. Normally there not much help but this time it was. In the tutorial they miss out one of the important part to make it work. I had made the object away from the center grid which is needed in order for it to work. So I redone the tutorial with the object in the center of the grid and it worked ! YAY ! hehe

Here's what I messed about with that only took like 1min to do.


Smash !

Published by Spider-Doo under , on 05:31
I have now worked out a very nice way of having the mine cart crash though the wood going into the next room. It took a while looking back at the previous test Ive have done with the Blast code plug-in. The main problem I was having was adding gravity and making the particles collide with a floor so they don't go through. The other thing I needed to achieve was making it brake apart more like wood then bricks.
This is the fracture map that I made in Photoshop, so when the impact of the cart hits the wood, it will break up upon where the white lines are. This way I can produce how the wood will break up.
Once I had this fracture map it was easy to Uv map the texturte on the surface.


In these videos below this is what I have got so far. There looking a lot better then the first ones.


Lava Test

Published by Spider-Doo under , on 11:51
This was testing how the lava will flow if we are going to use it still in our scene. I think it works ok, but I think that the texture on the lava can be a little bit better, as it lifespan is too quick. Also needs to be more gloopy like lava.

Over the Rainbow

Published by Spider-Doo under on 11:41
This sort of rainbow design will be in kitty's room, and the way it animates will be similar to the finial one in her scene.


kittys room test in AFx

Published by Spider-Doo under on 01:50
From the concept art that I was doing for this scene which I really liked, I had an idea. I wanted to bring this picture to life in After Effects. Since I had all the layers from Photoshop all I had to do was import them into a Photoshop document into After Effects and it would bring all the layer into the scene.
From this I laid it out like the concept Picture and animated certain layers.


I had done it split screen to show how they are both having different ride experience. Kitty was on top because it was like Kitty was in Heaven, having a really good ride and every thing was good and happy. Lee and Chloe were in like Hell having a bad experience so had to be at the bottom.


The video below is what I was mainly concentrating on and I was quite pleased with the final outcome. This will show what going to happen in the scene and what the waves are going to be animated like in Maya.
Hope you like it

Render test for ride signs

Published by Spider-Doo under , on 01:27
Here are some renders tests, testing out different colour lights that might suit the sign.
Although this probably wont be the real sign that we will use I still wanted to test out the colour in the lights.


This is an Ambient Occlusion pass below

Smashing test

Published by Spider-Doo under , on 15:04
I have been testing a way to have the wall smash when the cart come thought the wall and the zombie hand come thought the wall as well, sending brick of wood flying all over the place. I have tested it with a plug-in called "Blastcode" which is really good at creating debris and smashing effects. Here is what i have done with it soo far.

I know the bricks float off and do not really fall to the ground and go thought the floor but I wanted to see how good it would look using this blastcode

I think that this will work really well just need to tweak a few setting etc.. and I will look really good.

Grass tests

Published by Spider-Doo under , on 15:01
For the outside around the ride we are going to have grass possible blowing in the wind as the character enter the scene so it wont be just a dirt path.
Here is what I have done so far for tests.


These screen shots was done using the fur type process which gave you a little more control when adding variety to the grass e.g. length, making bald patches and other option. These have a little more unique style which is quite nice.

Here's what I started out with first. Just plain dry grass

Then I added some more greenness to the grass

I then changed the type of grass and made it not a dense and made a little path thought the middle, where possible people have walked down.

And on this one I have added some more grass coloured the floor brown and added some little flowers to make it seem more real.


These two below have been done using the paint effects and then adjusting the setting to make it look like grass. This way I thought gave a very nice look and with some variation in grass type it would look really good. And this can be animated to blow in the wind if needed.